

Radiator covers can enhance the look of a room. Fitting them correctly will make them look even better. Here is how to fit a radiator cover the way I recommend .

The video
There is also an easy to follow Youtube video on my channel to support this article.
Whether you have bought a radiator cover or you have followed one of my previous articles and made your own. You will want to fit it back to the wall properly. Because radiator covers are by design top heavy. Covers that are not fixed back to the wall could fall over and cause damage and/or harm.
The tools I use
- Masking tape or frog tape
- Tape measure
- Trend multi scribe tool
- Compass
- Profile gauge
- Panel saw
- Coping saw
- Long reach bit holder
- Drill
- Drill bits
All of the tools above can be found in our Amazon affiliate shop. https://www.amazon.co.uk/shop/spendtimesavemoneydiy
Woodworking plans
If you are a keen woodworker or would like to be. Check out this link. http://stsmdiy.tedsplans.hop.clickbank.net/?tid=tracking
How to fit a radiator cover
Here is the method I use to scribe and fit a radiator cover.
Scribing over the skirting boards
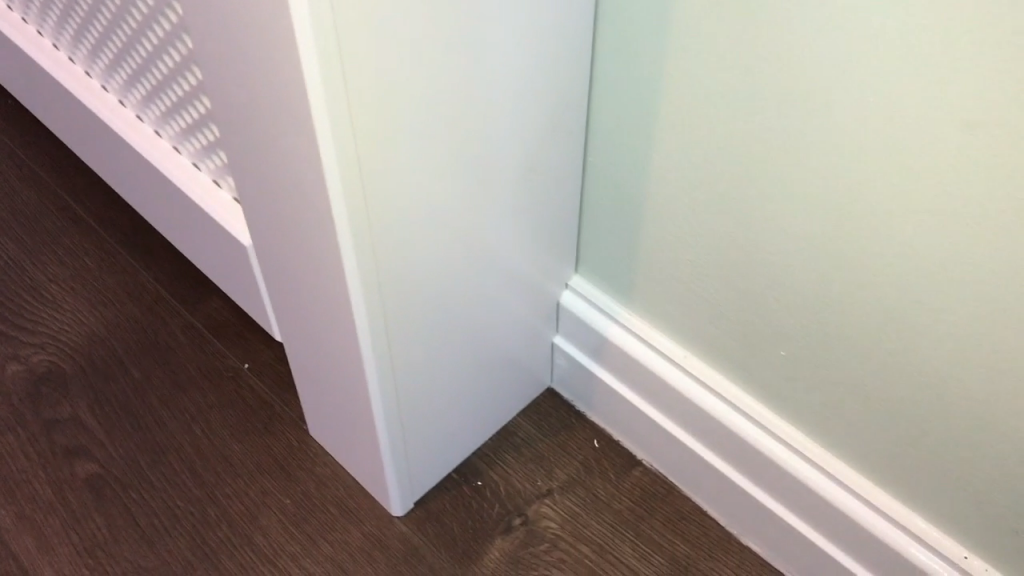
Radiator covers need to be cut at the bottom, over the skirting boards (baseboards if you speak American). This allows them to sit back against the wall. Many bought covers will have a universal cut out. This is usually 25mm x 150mm. It is designed to go over most skirting boards. But it looks terrible. And in my opinion, if the cover is cut to fit nicely around the skirting board, it makes the job look so much better and more professional.

Step 1
If the radiator cover is already painted it is advisable to put a couple of pieces of masking tape or frog tape on the areas which are to be cut away. This will keep all of the pencil lines away from the paint. But through bitter experience. When you put masking tape onto a painted surface, sometimes when it is removed it can lift the paint. A little tip I can give you to avoid this problem is to simply stick the masking tape to an item of clothing. Remove it from the clothing and then stick it to the painted surface. By doing this, fibres from the cloth are stuck to the masking tape so the stickiness isn’t strong enough to lift the paint.


Step 2
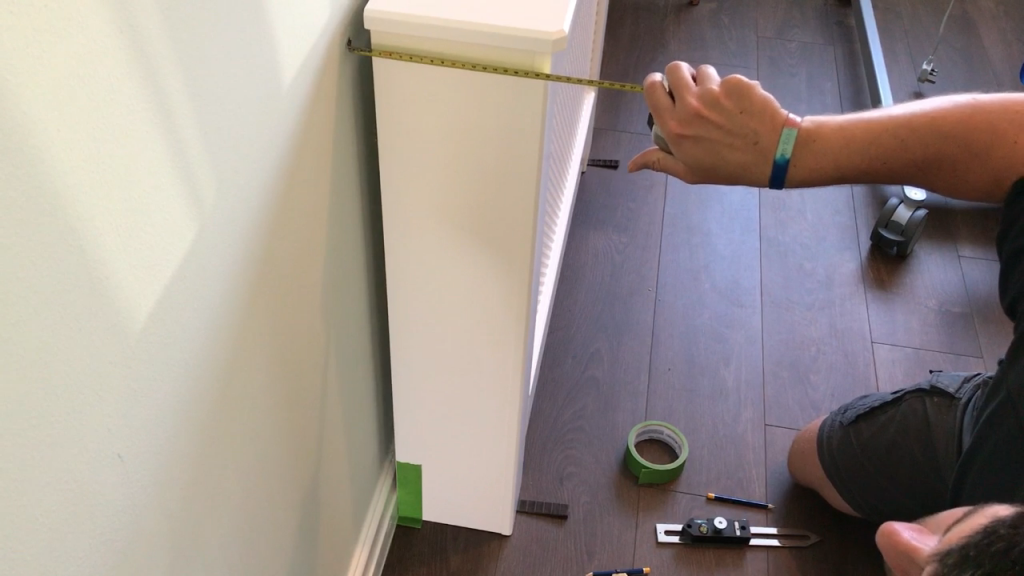
I now get the radiator cover in position, hard up against the skirting board and get it parallel with the wall. I do this by putting small furniture wedges under the front of the cover until the measurement at the top is the same as at the bottom. This is a necessary step to ensure the cuts I make will be parallel with the skirting board.

Step 3
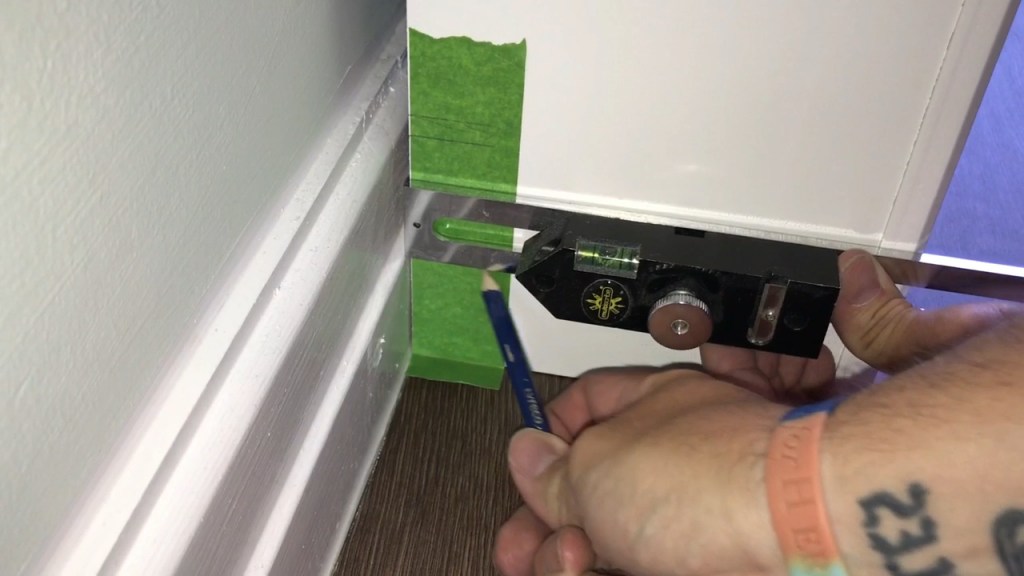
Now that the masking tape is on I can mark out the shape of the skirting board on it. I start by marking each transition point of the profile with either a small spirit level or I prefer a Trend multi scribe with a built in level. The reason I mark these points level is so when I’m marking the shapes of the profile I know they are in the right place.
Step 4
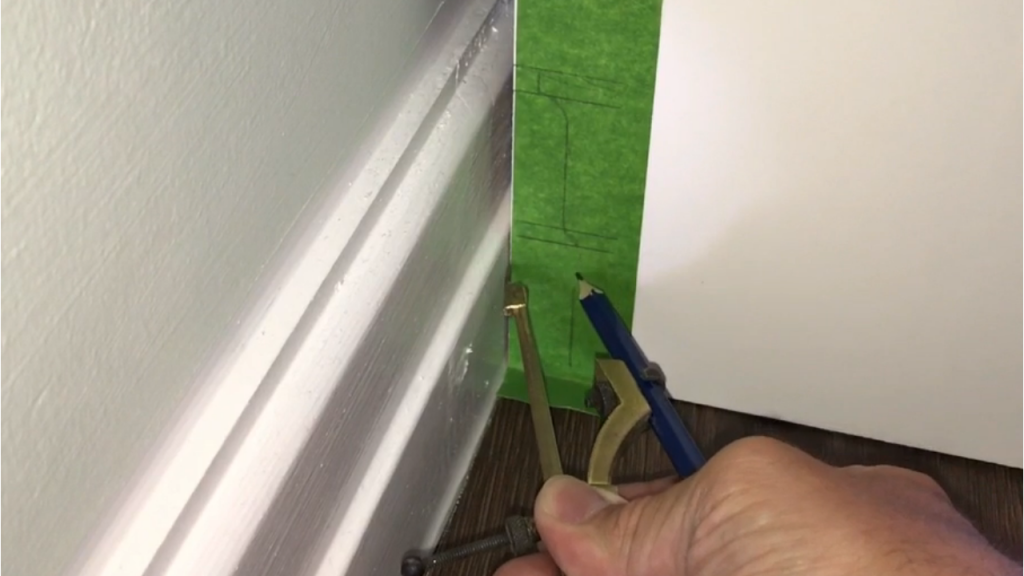
With all of the transition points marked out it’s time to draw the rest of the shape of the profile. I do this with a precision compass. The one I use has a long pin to get right into the profile. And it has a screw adjustment to get the precise measurement. Having the screw adjustment also means the points won’t slip when moving the compass.
To set the compass first double check the radiator cover is hard up to the skirting board and parallel to the wall. The measurement from the wall to the back edge of the cover is what I set the compass to.
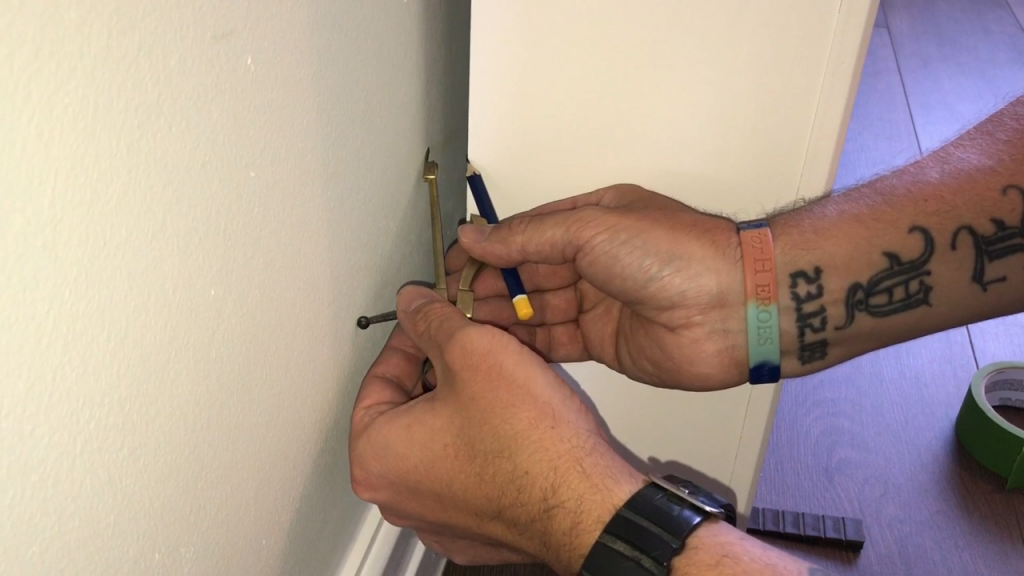
With the compass set I can guide the pin along the skirting board whilst the pencil draws the shape of the profile on the cover. All the time I am keeping the compass level otherwise the marks won’t be accurate.
Cutting out the profile
Since only the outside of the cover will be seen it makes sense to back cut the scribe cut. This means I make my cuts at a slight angle so that only the front edge of the cut touches the skirting board.
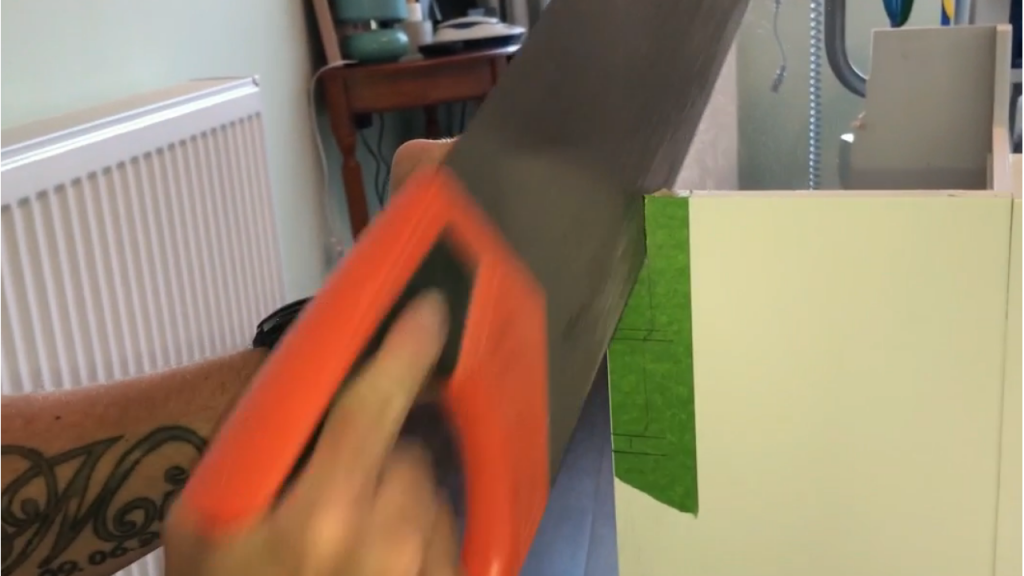
For the straight parts of the profile I use a panel saw to cut these. And for the shaped cuts I use a coping saw. This gives me great results. No need for any Jigsaws or power tools.
Cutting profile shapes can take some skill. My advice is to take your time and cut up to the line, not past it. Remember you can always cut more off it’s a lot harder to put it back on. If your cut starts to creep away from the line, it won’t correct itself. Stop, back it off, adjust the saw and cut up to the line.
I put the radiator cover back into position to check the cut. Now is the time to be fussy and get it right. Because the cut is back cut if I needed to take a little more off I could do this with a chisel or some rough sandpaper very easily.
Fixing to the wall
My preferred method for fixing radiator covers to the wall is with 2 angle brackets. This method is quick, easy and cost effective. Other methods such as french cleats or keku fixings could be used but angle brackets is a lot easier.
I put the cover into it’s final position and mark the holes in the angle brackets onto the wall. If a pencil isn’t long enough to mark the holes I just use a long reach bit in my drill to make an indent in the wall.

Now that the wall is marked, I can remove the cover and drill the wall. Before drilling it is important to make sure there are no pipes where you are going to be drilling.
When drilling into walls instead of having the bother of using a hoover I use a homemade dust catcher that I make from a piece of A4 paper and a piece of tape. Below is a link to the video of how I make dust catchers.
I use a 5.5mm masonry drill bit so I can use a red plastic wall plug and I drill the hole just a little deeper than the screw I will be using (1 1/4″ x 10 screws). I then put the plugs into the holes in the wall. Now I can bring the cover back into position. And using a long reach screwdriver I screw through the angle brackets securing the radiator cover to the wall.

So that’s how to fit a radiator cover. I hope you will check out my article on how to make a radiator cover and have a go at this yourself.
Thanks for reading and watching
I hope this article helps you with your project. If it has then please leave me a comment and let me know how you get on. Be sure to watch my Youtube video that accompanies this article and remember to Like, share and subscribe to help the channel grow. You can follow me and our house on Facebook and Instagram for the latest projects on our renovation or my latest DIY tips. Links are at the top of the page.
Making videos and blogs to help others improve their DIY skills takes a lot of time and can also cost a lot of money. If you would like to make a donation to help the channel and website grow, develop and improve it would be greatly appreciated and put to good use. Just follow the Paypal link below. Thank you in advance. https://www.paypal.me/spendtimesavemoney