

A simple but organised tool wall is a must in any workshop, garage or shed. It saves valuable time looking for things and also lets you know what’s gone missing. (When the neighbours don’t return your tools).

The video. Creating a simple tool wall for the workshop. No french cleats.
There is also an easy to follow Youtube video on my channel to support this article. Please feel free to check it out. I would appreciate you giving it a thumbs up and subscribing to the channel. Thanks.
Tool walls in my experience
I have been a cabinet maker and a joiner now for over 20 years. I have worked in many workshops both large and small. In huge industrial units and in small sheds and garages.
I have encountered dozens of different methods of storing and organizing tools. From all tools kept in tool boxes to tool walls with fancy tool holders featuring the French cleat system to hang them on the wall.
So I consider myself to be qualified enough to say a basic tool wall, with simple hanging methods is the best way to organise your tools.
It’s surprising how much time a well organised tool wall can save you.
Why no French cleats on my tool wall?
Firstly for those of you who don’t know what a French cleat is I will explain.
2 pieces of wood are ripped down with a 45 degree angle along the length. One is attached to the wall. The other is attached to the back of a cabinet or a tool holder. They interlock creating a very strong way of hanging something on the wall. As pictured below. Please excuse my crude computer drawing. It’s a skill I am yet to master.

To make a french cleat takes time and usually a table saw or bandsaw. Unless you are skilled with hand tools. Some people don’t have these and to me they are overkill for a tool wall. I prefer to use simple screws or nails or very basic hooks and holders.
French cleats do make it easy to move things around but with screws and nails you can simply remove them and put them where required.
What material do I use for the tool wall?
I have a lot of off cuts of sheet material lying around my workshop. I want the tool wall to be made from something that is 18mm thick because with 18mm material the screws and nails have plenty to bite into and have a strong grip.
On the day I built my current tool wall I had some off cuts of OSB board (orientated strand board) which was left over from doing the workshop floor. Plywood or MDF would have been just as good.

I used a table saw to cut the OSB board to size because it was convenient but I could have used a hand saw to cut it down.

A lot of tool walls I see are left as the bare material which is fine. I had the time and some left over paint. So to brighten up the workshop a little I applied a coat of paint.
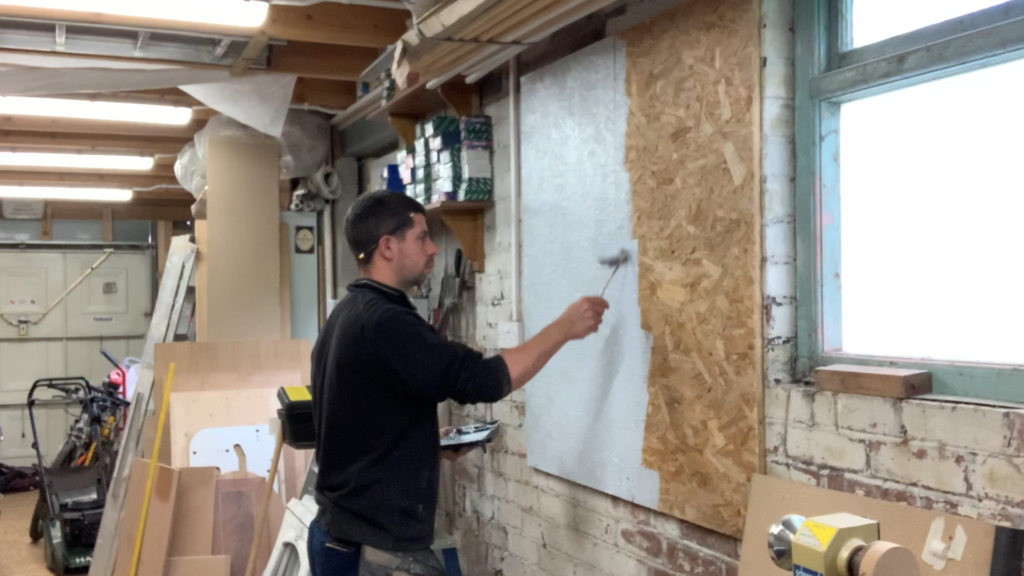
Fixing the tool wall to the wall
The walls in my workshop are all solid brick which makes it easy to fix things to the wall. To put the OSB boards on the wall I used red wall plugs and 50mm screws. I drilled 6mm holes in the OSB before trying to put it up. These holes give me an easy start for the 5.5mm masonry bit I use to drill into the brick. I can either use the starter holes to spike the walls with the masonry bit or I can drill straight through and put the plug and screw through the board into the wall.
If your walls are made of something different then use a suitable method to fix the tool wall firmly to the wall. Remember it will be carrying a lot of weight.

Collecting tools for the tool wall
I have an obscene amount of tools scattered all over the workshop, and around the house for that matter. I have been collecting them for over 25 years now since I was a kid. So before I started mounting anything to the tool wall I gathered together all the tools I would use most often in the workshop.
Tools that are rarely used take up valuable space on a tool wall. So Only the tools I use most often make it onto the tool wall. Everything else I try to find a home for in an easily accessible place. Such as one of my many tool boxes or in a cupboard or drawer. As the saying goes “Everything should have a place and everything should be in it’s place.” A great rule to live by.
Configuring the layout of the tools on the tool wall
Once I’d gathered all the tools together for the tool wall I laid them out on the bench in places I thought they would go. I spent some time moving the tools around until I came up with a configuration that I thought was the best layout. Then I went away for a bit and came back to look at the configuration with fresh eyes. I moved things around again and again until I was happy. But as I’ve said before, if the tools are mounted with nails and screws it’s easy to move them around if you find the tools aren’t in the right place.
I tried to keep the tools in place by category. So I tried to keep all the measuring tools together, all the saws together, all the striking tools together and so on as best I could.

Amazon affiliate shop
I have an Amazon affiliate store where you will find most of the tools featured in this blog. If you make a purchase through my store or links then the channel makes a small commission but it doesn’t cost you anymore than it usually would and it helps support the channel. Thanks.
https://www.amazon.co.uk/shop/spendtimesavemoneydiy
Mounting my combination square on the tool wall
Although most of my tools I’m happy to hang up with screws or nails, my combination square I prefer to have that sitting on a block of wood.
I had a scrap of 2 x 2 timber lying around so I used that. I simply cut it to length on my mitre saw and cut a groove down the middle of it with my table saw, deep enough for the squares rule to sit in. This piece got screwed to the bottom of the tool wall in an easy to reach place because I use this square on nearly every project I make.
I also drew around the square with a permanent marker pen. I do this with all the tools on my tool wall. It makes it very easy to find where things go when putting them back on the tool wall or to identify if something is missing. So the tool wall is also a shadow board.

Mounting the tools
Hammers and mallets
Hammers and mallets were the first things to go up on my tool wall. These are easy to up. They either hang on a couple of screws or I use a double hook used for hanging garden tools up.
Spanners
My small set of spanners went up next and they have a convenient handle on them so I could have used one or two screws but I opted to use another garden tool double hook.
Chisels, not quite on the tool wall
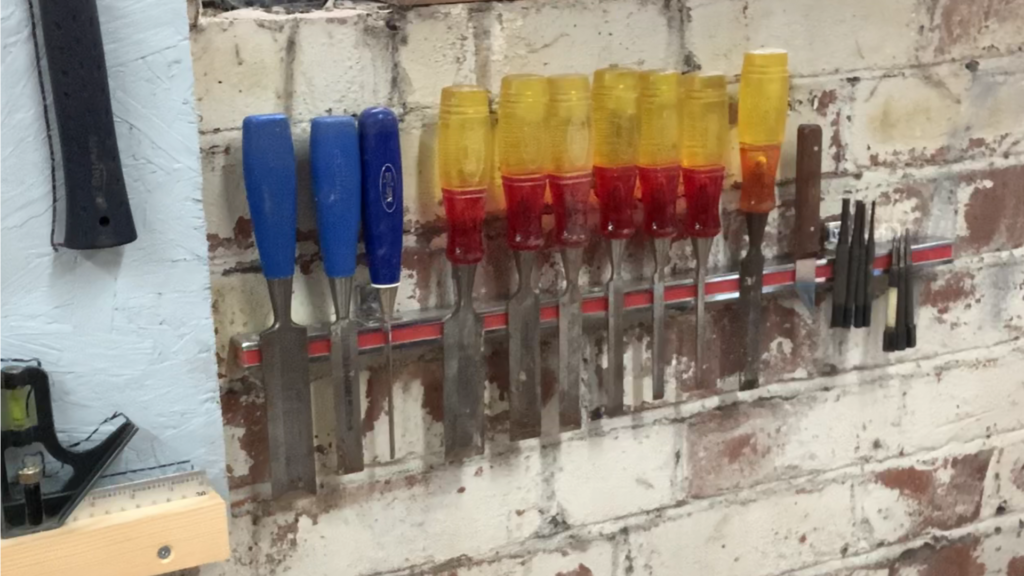
For my chisels, marking knife and punches I like to use a magnetic holder for shear convenience. The holder makes it so easy to take them off and put them back on again. And to save some space on the tool wall I put the magnetic holder on the wall next to the tool wall.
Spoke shaves
My two most commonly used spoke shaves were simply hung up on a nail through the hole in their handles.
Rules, knives and bevels
Steel rules, stanley knives and my sliding bevel again were just hung off nails because the holes in them were too small for them to go over screw heads.
Coping saw and depth gauge
Coping saw and depth gauge hung off a couple of screws.
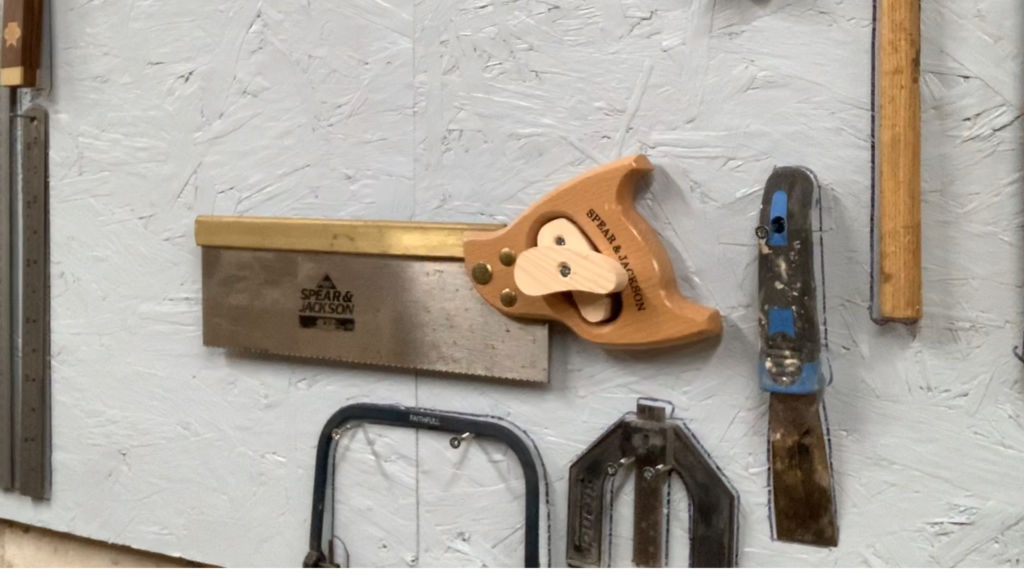
Tenon saw
My tenon saw however I did something a little different. I could have simply hung it off one screw and had it pointing down but with the size of the saw it wouldn’t have been very secure.
So I made what I call a saw turn button. I also use these in my cabinet makers tool boxes. These are simple to make and are a brilliant way to keep your saw secure.
To make it I used a scrap of timber that was about 10-12mm thicker than the handle of my saw. I drew around the inside of the handle onto the piece of timber and cut it out on my scroll saw. Then using my bandsaw I cut the piece of timber to just slightly thicker than my saw handle, no more than 1mm. This piece is the holder and the off cut becomes the turn button that stops the saw falling off. The holder has one offset screw through it into the tool wall and then a longer screw goes through the turn button, through the holder and into the tool wall stopping the holder from rotating but allowing the button to rotate freely.
Tape measures
I came up with this method of storing tape measures many years ago. I always have a few different sized tape measure easily to hand as well as others scattered around the workshop in convenient places. There is nothing more annoying than trying to find the tape measure you just put down somewhere.
All the tape measure holder is, is a spare steel rule, this one was from a combination square that was no longer square and two pieces about 20mm long cut from a length of 25mm dowel. I drilled a hole in each end of the steel rule for screws. I also drilled holes in the centre of the pieces of dowel so the screws didn’t split them. The pieces of dowel act as a space so the hook of the tape measure can hook onto the steel rule.

Screwdrivers
I could have used another magnetic tool holder to mount my screwdrivers like I did with my chisels but I chose this method instead, in the future I might use a magnetic tool holder to free up some space on the tool wall.
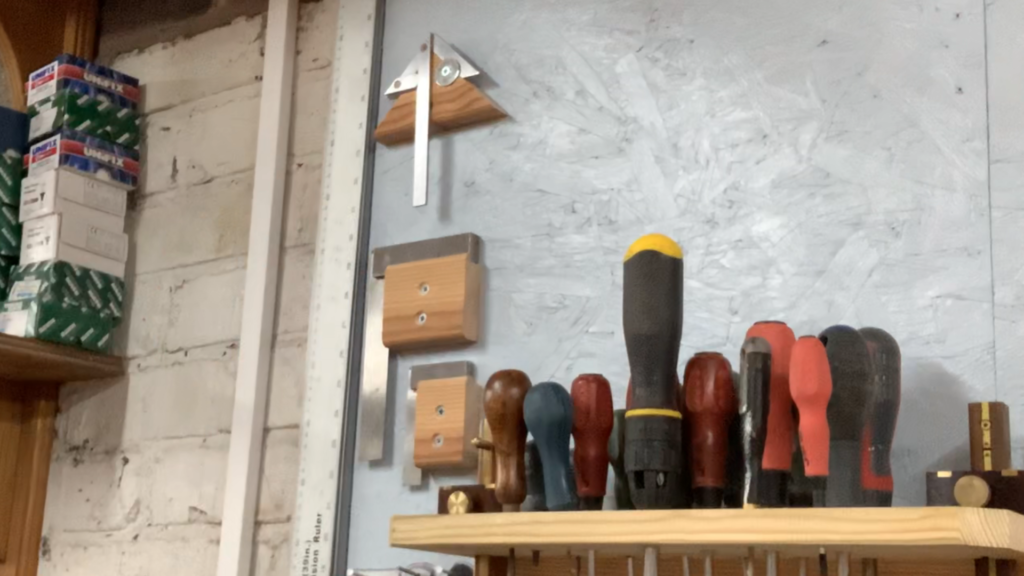
Two off cuts of timber was all I needed to store my screwdrivers. A piece of 6 x 1 and a piece of 2 x 1. I drilled a series of holes of different diameters to accommodate the different shanks of the screwdrivers so every screwdriver has a specific hole. I screwed the piece of 2 x 1 to the back of the 6 x 1 so I could screw through it into the tool wall.


Squares
For my engineers squares I decided against using screws. Instead I used a scrap of 3 x 1 timber with a small rebate at the top so the squares could sit securely on them and wouldn’t be able to fall off.
Pencils and pens
You can never have enough pencils in a workshop. They are forever going missing. My ears are my pencil holders but even with them behind my ears they still disappear. So having a stock of them on the tool wall is a great idea so when one goes astray you know where to find another quickly.
All I used for my pencil holder was a tin can. I hammered the sharp edge flat so it wasn’t sharp anymore, drilled a hole in the back and screwed it to the tool wall. Hey presto a pencil pot.

Cost of the tool wall
The cost of the tool wall was virtually nothing. It has to be one of the cheapest projects I’ve done. The osb boards were off cuts so they were free. All the timber I used was small off cuts destined for the bin so they were free. The nails and screws I already had but you could say there was a small cost for them but only pennies. I already had the magnetic tool holder but they are fairly cheap anyway. There is a link to them in my Amazon affiliate store please see the shop link above.
Thanks for reading and watching
I hope this article helps you with your project. If it has then please leave me a comment and let me know how you get on. Be sure to watch my Youtube video that accompanies this article and remember to Like, share and subscribe to help the channel grow. You can follow me and our house on Facebook and Instagram for the latest projects on our renovation or my latest DIY tips. Links are at the top of the page. Or you can contact me using the link below. http://spendtimesavemoney.com/index.php/contact/
Making videos and blogs to help others improve their DIY skills takes a lot of time and can also cost a lot of money. If you would like to make a donation to help the channel and website grow, develop and improve it would be greatly appreciated and put to good use. Just follow the Paypal link below. Thank you in advance. https://www.paypal.me/spendtimesavemoney
Or you may wish to support us via patreon https://www.patreon.com/Spend_time_save_money_DIY
Hi Rob,
I am looking for someone to do all of the skirting boards and arc around the doors in my house, the house is empty at the moment. Do you do this kind of work I in the Litherland area of Liverpool and you would be able to film if you wanted to as well. Thanks in advance
John Redmond
Unfortunately I don’t do work for other people. I just don’t have the time. Thanks for asking though.